Mastering the Hibiscus Task Wizard
If you've ever installed a piece of software, you've probably encountered a wizard before — even if you didn't know that's what it was called. In the world of software, a "wizard" is just a step-by-step helper that walks you through a task that might otherwise feel overwhelming. Instead of facing a blank form with dozens of fields to fill out, a wizard asks you one thing at a time and handles the rest. That's exactly what the Task Wizard does for creating tasks in Hibiscus.
You won't find anything on the Hibiscus screen labeled "Task Wizard" — it's just what we call the panel that appears when you click Add Task, or when you complete a task that's already in progress.
It might catch you off guard. You just finished your work — why is more stuff appearing? The short answer: Hibiscus tries to keep your projects from getting stuck. If a project isn't marked complete but has no open task, we consider it stuck, and we want to help you avoid that.
The Task Wizard is designed to get out of your way as quickly as possible. As soon as it has enough information to create a task, a Create Task Now button will appear — you can click it and move on at any point during the process.
Step 1 of 5: The Task Summary
The first thing you'll see in the Task Wizard is a text box labeled "Describe the new task", along with a Task Summary panel below it.
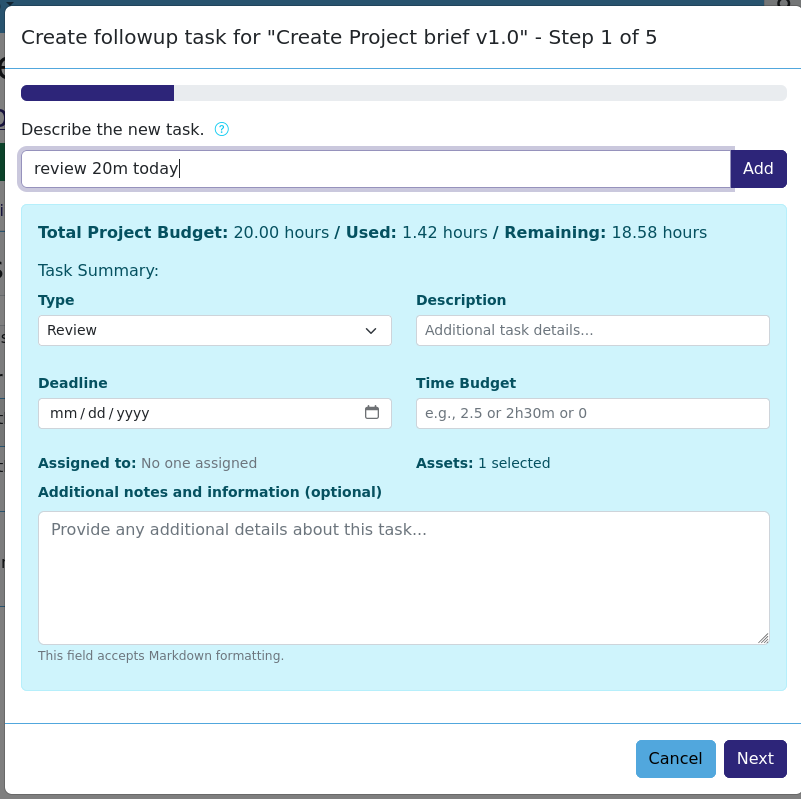
The text box accepts a shorthand description and fills in the Task Summary for you. Hibiscus also tries to anticipate what kind of task comes next — just finished a Create task while working with a collaborator? It'll suggest a Review task. Just finished a Submit task? It'll suggest a Project Management task. You can always override this with a few words.
Here's a simple example: you want to assign a Create task, budgeted for three hours, due tomorrow.
In the "Describe the new task" box, type: create 3h tomorrow
Click Add.
The Task Summary will fill in automatically. Here's how the shorthand works:
First word — the task type. Try create, review, or pm for project management.
Time budget — for example, 4h50m for four hours and fifty minutes, or 3.5h for three and a half hours.
Due date — Hibiscus recognizes today and tomorrow, or a date like 4/15 for April 15th.
Anything else — goes into the task's Description field.
You don't have to use the shorthand at all. If you prefer, you can fill everything in manually directly in the Task Summary panel.
Step 2 of 5: Select or Create Assets
Most tasks are connected to an asset — a document, image, or other deliverable you're working on. This step is where you make that connection.
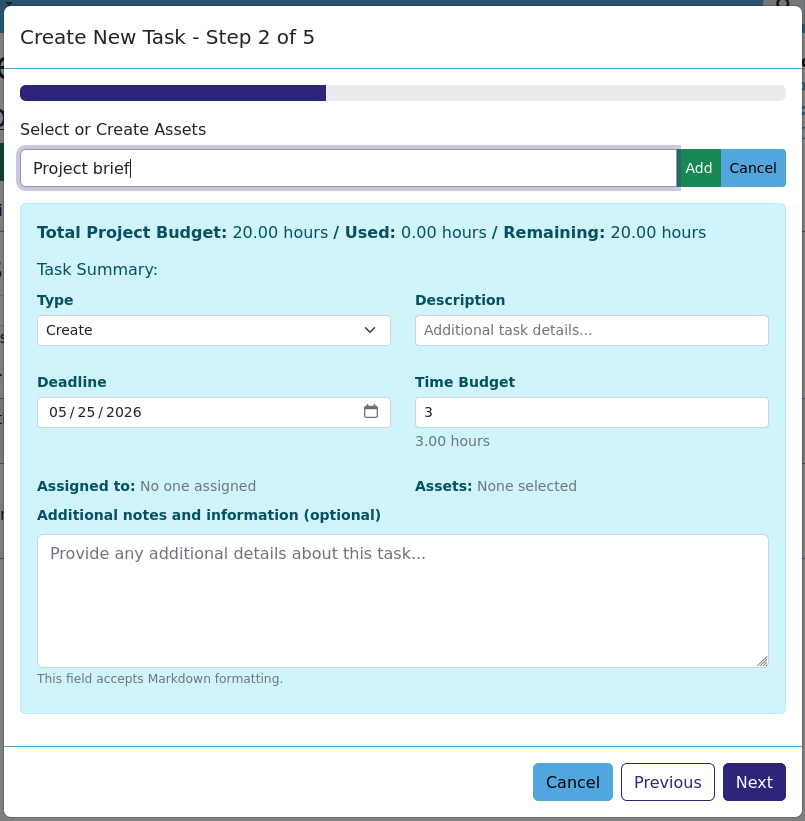
If you're starting something brand new, you can name the asset here. For example, if you're working on an Instagram campaign, you might create assets called "Campaign Plan," "Frosty Beverage Image," and "Cute Cat Image." If your client has a document or image template you work from, you can upload it here as a starting point for the new asset.
If this task doesn't need an asset — like a check-in meeting or an admin task — you can skip this step entirely.
Step 3 of 5: Assign People
Next, assign someone to work on the task. You'll see a list of everyone added to the project, and you just pick who's responsible.
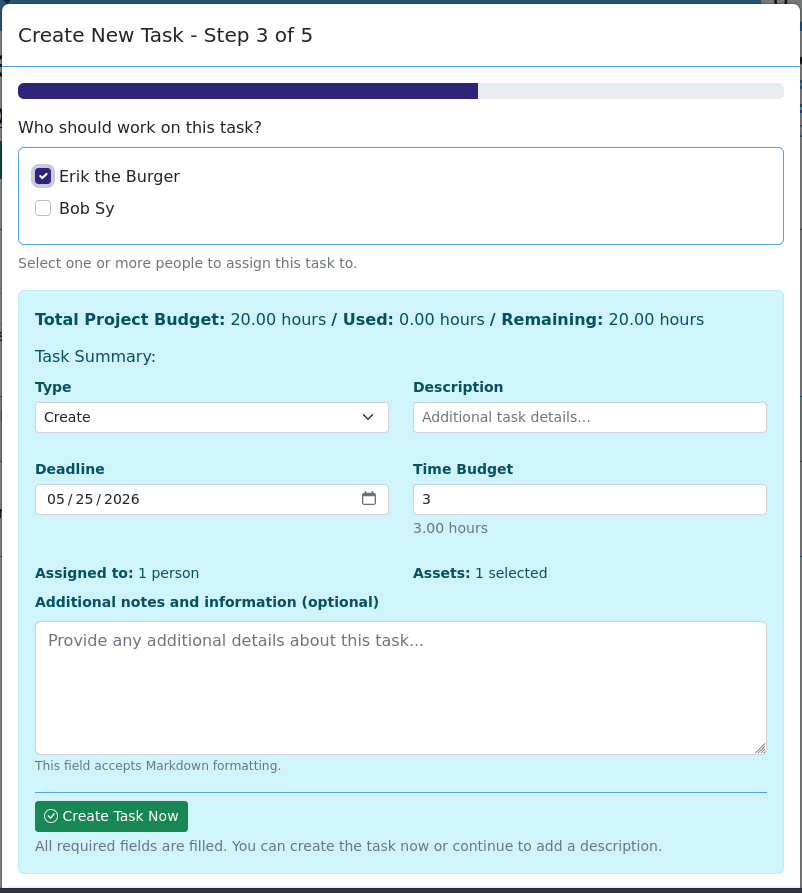
You can select multiple people, but keep in mind: a separate task is created for each person you select. That's great for meetings or project management tasks, but if you're assigning work on a specific asset, you'll end up with duplicate tasks. In most cases, assign one person per asset task.
Step 4 of 5: Due Date
Pick the deadline for this task using the calendar. That's it.
Step 5 of 5: Time Budget
Finally, set how long this task should take. As freelancers ourselves, we know how important it is to keep a close eye on your time — especially when you're billing by the hour. The time budget helps you make sure each task, and the project as a whole, stays within scope.
A Note on "Create Task Now"
Throughout all five steps, keep an eye out for the Create Task Now button. It appears as soon as Hibiscus has enough information to finish creating the task — which might be as early as Step 1 if you've filled everything in using the shorthand. Click it whenever it appears and you're done.
Getting Into the Flow
Every project management tool has its own way of doing things, and it takes a little time to find your rhythm. We've been using and refining this workflow for nearly a decade, and we genuinely believe it can work well for small freelance teams and individual freelancers. Check out gethibiscus.io, give it a try, and let us know what you think!